
Think of facial exfoliation as a reset button for your skin—sweeping away dull, dead cells to reveal a fresh, healthy glow underneath. It’s like letting your skin finally breathe! Regular exfoliation can transform your complexion, helping to smooth out rough patches, reduce flakiness, and clear out clogged pores for skin that feels baby-soft.
So, why do I need to exfoliate? Because your skin is constantly renewing itself. Exfoliation helps remove the old skin cells that can pile up on the surface, making room for newer, brighter skin to shine through. The bonus? Your skincare products—like moisturizers and serums—can absorb more deeply and work more effectively when your skin is freshly exfoliated.
There are two main types of exfoliators:
- Physical exfoliators: These include scrubs with fine granules that manually slough off dead skin. You feel the exfoliation as it happens—instant gratification!
- Chemical exfoliators: These are your skin’s silent heroes. Using active ingredients like AHAs (alpha hydroxy acids) and BHAs (beta hydroxy acids), they gently dissolve dead skin cells without any scrubbing.
Both have their benefits, and the right one for you depends on your skin’s unique needs.
But here’s the key: moderation. Over-exfoliating can leave your skin red, irritated, and sensitive. Skip it altogether, though, and you risk dullness and congestion. So, understanding when and how keeps your skin smooth, radiant, and happy.
Crafting the Perfect Homemade Facial Scrub: A Natural Glow, Made Simple

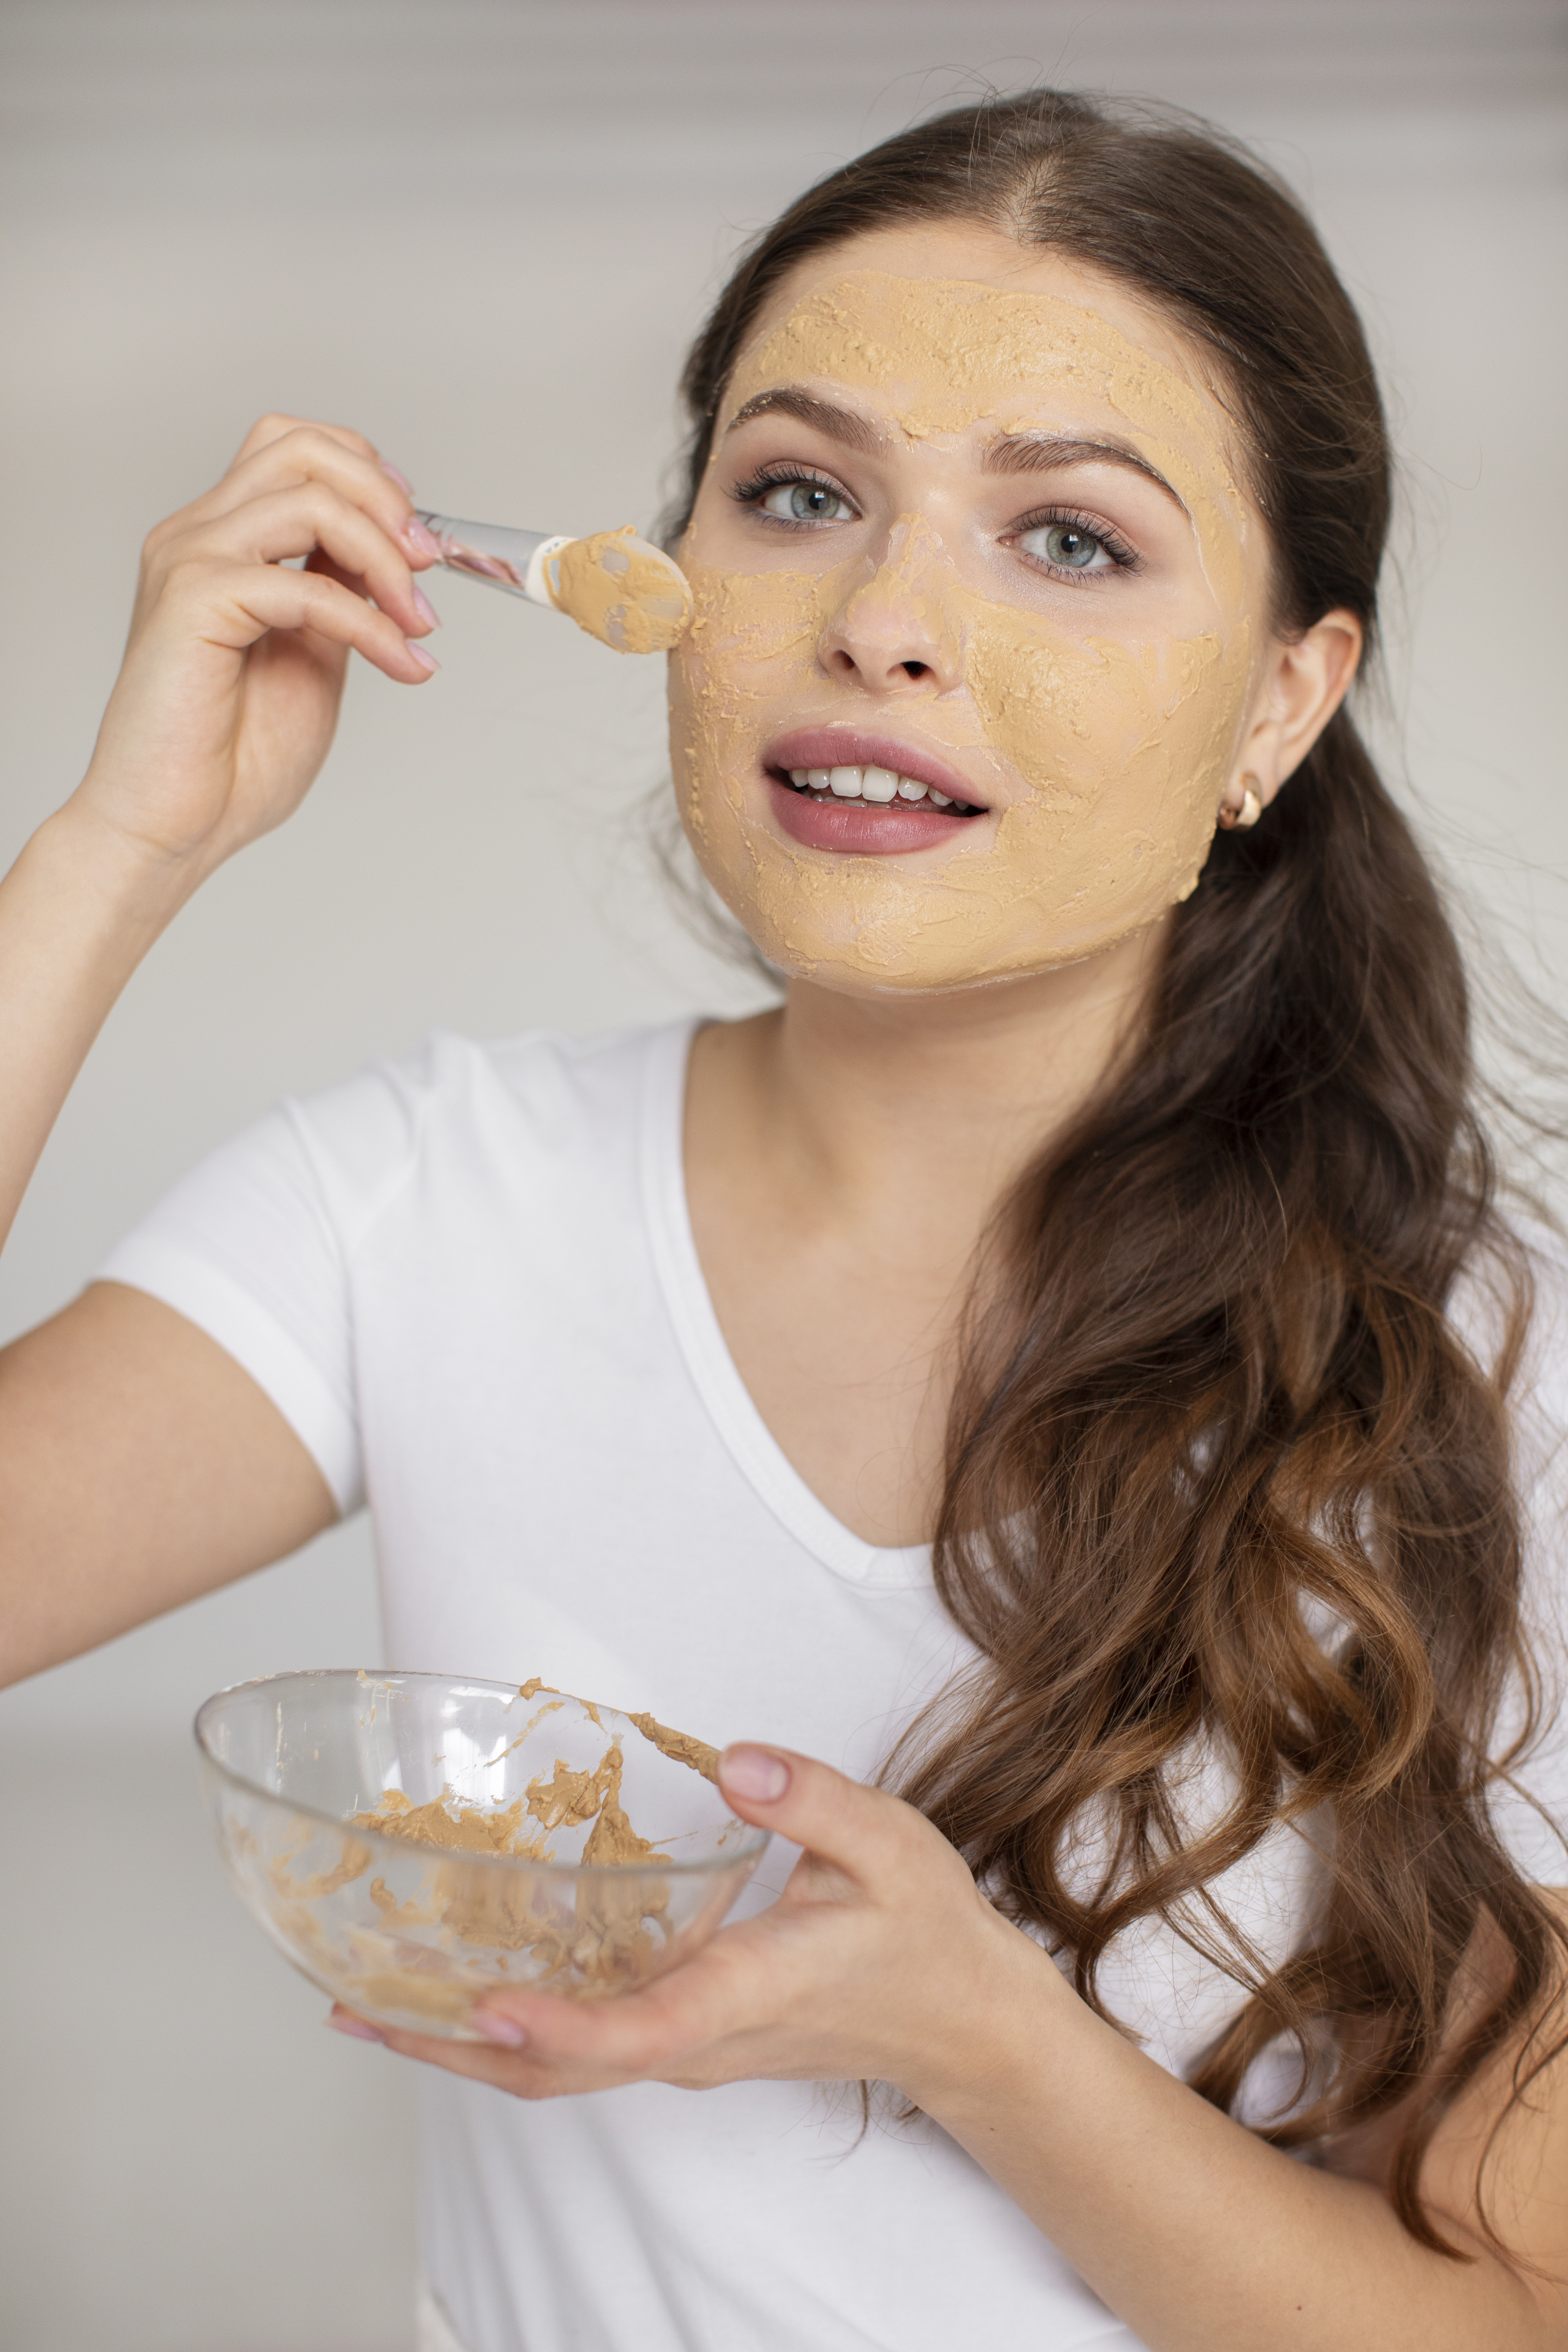
Creating your own facial scrub at home can be both fun and beneficial, especially when you know exactly what’s going into it. With just a few natural ingredients from your kitchen, you can create a custom blend that leaves your skin smooth, refreshed, and radiant. The best part? You control what goes on your face—no mystery chemicals, just skin-loving goodness.
How to Make the Perfect Homemade Facial Scrub for Your Skin Type
Looking for a clean, natural way to exfoliate your face? Homemade facial scrubs are a simple and effective way to rejuvenate your skin without harsh chemicals. With just a few pantry staples, you can craft a custom exfoliator that suits your skin’s unique needs, leaving your face smooth, refreshed, and glowing.
💡 Why Use a DIY Facial Scrub?
Exfoliating your skin removes dead skin cells, unclogs pores, and boosts cell turnover. This not only helps reveal a fresher, more radiant complexion but also improves the absorption of moisturizers and serums. Natural ingredients like honey, sugar, and oats are gentle yet powerful exfoliants that work well for most skin types.
🧴 Core Ingredients for Homemade Face Scrubs:
1. The Base: Choose a gentle exfoliant
Think sugar, sea salt, finely ground oatmeal, or even coffee grounds—natural ingredients that slough off dead skin without being too harsh.
2. The Liquid: Hydrate and nourish
Add a moisturizing element like raw honey, plain yogurt, or nourishing oils (coconut, jojoba, olive, or avocado) to soften and calm the skin.
3. The Boosters: Customize with care
Customize with essential oils (like lavender or tea tree), aloe vera, fruit extracts, or vitamin E to enhance the benefits.
Best DIY Facial Scrub Recipes:
1. Brown Sugar + Honey Scrub
A timeless go-to. Perfect for all skin types. Sugar gently exfoliates, while honey hydrates and offers antibacterial benefits. Just mix 1 tbsp of sugar with 1 tsp of honey—massage, rinse, glow.
2. Oatmeal + Yogurt Scrub
Ideal for sensitive or irritated skin. Ground oats calm and exfoliate, while yogurt adds gentle moisture and probiotics for a skin-soothing treat. Combine equal parts oats and plain yogurt for a creamy, calming scrub.
3. Coffee + Coconut Oil Reviver
For that extra boost. Great for dull or tired skin. Coffee stimulates circulation and may reduce the appearance of puffiness, while coconut oil deeply nourishes. Use equal parts fresh coffee grounds and melted coconut oil.
Match Your Face Scrub to Your Skin Type
Homemade scrubs aren’t one-size-fits-all, so think about your skin’s needs:
- Oily or Acne-Prone? Add a splash of fresh lemon juice for a natural astringent kick.
- Dry or Mature Skin? Use richer oils like avocado or sweet almond for deep hydration.
- Sensitive Skin? Stick with oats, chamomile, or aloe vera for a gentle touch.
🚫 Don’t Overdo It
Even the best scrub can do more harm than good if used too often. Over-exfoliating can leave your skin irritated and stressed. Keep it gentle and hydrate after. Homemade scrubs are meant to be simple yet effective, so embrace the easy, natural path to fresh skin.
Exfoliating Your Face at Home: Step-by-Step Guide
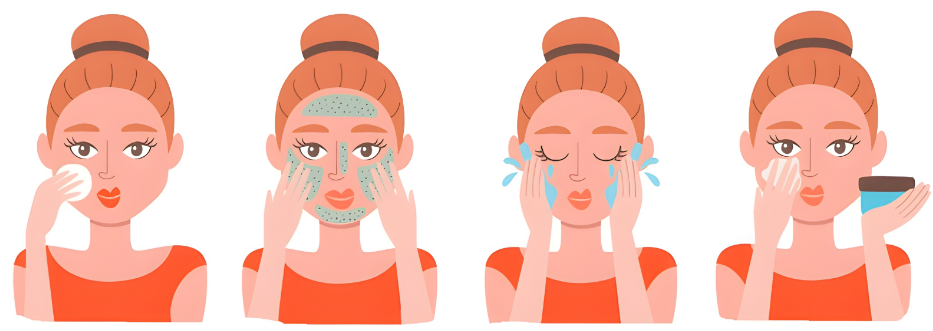
Feel like getting your glow on but not sure where to start? Here’s a quick guide to exfoliating your face at home, making it easier to nail that radiant look without fuss.
1️⃣ Start with a clean canvas – Wash your face using a gentle cleanser. You want to remove any dirt, oil, or makeup so your exfoliant can actually reach your skin, not just sit on top of grime.
2️⃣ Choose your exfoliant – Grab your favorite exfoliator, (homemade or store-bought) and apply it in gentle circular motions using your fingertips. If you want to level up, use a soft exfoliating brush or a silicone scrubbing pad. They add a nice boost without being too harsh.
3️⃣ Rinse it off – After buffing gently, rinse thoroughly with warm water. Make sure no scrub particles are left behind—they can clog pores if not fully removed.
4️⃣ Pat & moisturize – Use a clean towel to pat your face dry (don’t rub!). Follow up with a hydrating moisturizer—your skin needs love and moisture post-exfoliation.
How Often Should You Exfoliate?
- Oily/Combo skin: 2–3 times a week
- Dry/Sensitive skin: 1 time a week
Keep your eye on the condition of your skin; if you notice unusual redness or irritation, ease up on the frequency.
As always, do a patch test on a small area of your skin to ensure you don’t have an allergic reaction.
Natural Exfoliants: The Best Ingredients for Radiant Skin
Going natural with exfoliants is a win on so many levels. Not only are you skipping harsh chemicals, but you’re also giving your skin ingredients it can actually understand and respond to.
1. Baking Soda
Yep, straight from your kitchen shelf! Baking soda makes a super gentle exfoliant. Just mix a little with water to form a paste and you’ve got yourself a simple, effective scrub. It’s mild enough for most skin types and can help brighten dull skin.
2. Green Tea
Green tea isn’t just for sipping, it’s a skincare hero, too. The leaves have a lightly gritty texture that helps removing dead skin cells, while the antioxidants calm inflammation and fight free radicals. Try mixing cooled green tea leaves with a spoonful of yogurt for a double-duty exfoliating and soothing treatment.
3. Lemon Juice
Looking for a natural glow-up? Lemon juice contains alpha-hydroxy acids (AHAs) that naturally break down dead skin. But a little goes a long way; always mix it with a calming base like honey or aloe vera to prevent irritation.
4. Cucumber Seeds
Surprisingly soothing, cucumber seeds blended into a paste offer a refreshing, gentle scrub—especially great for sensitive skin. Think of it as a cooling spa treatment right at home.
💡 Pro Tip:
Natural doesn’t always mean perfect for every skin type. If something stings or turns your skin red, switch it up. The goal is radiant, healthy skin, not irritation.
So go ahead, experiment, mix it up, and discover the natural exfoliant that brings out your best glow.
How to Care for Your Skin After Exfoliating
You’ve just exfoliated and your skin feels fresh and renewed—now it’s time to keep that healthy glow going strong. Here’s how to care for your skin after exfoliation to ensure it stays smooth, calm, and radiant:
💧1. Hydrate Immediately
After exfoliating, your skin may feel a little thirsty. Replenish lost moisture with a gentle, lightweight moisturizer that hydrates without clogging pores. Think of it as a soothing, skin-loving hug.
☀️2. Never Skip Sunscreen
Exfoliation leaves your skin more vulnerable to sun damage. Apply a broad-spectrum SPF 30 (or higher) daily, even if you’re staying indoors or it’s cloudy. Your skin will thank you with fewer fine lines and dark spots down the road.
👀3. Watch for Warning Signs
If your skin feels tight, looks red, or feels irritated, it may be telling you you’ve overdone it. Step back your exfoliation frequency and choose gentler formulas. Your skin’s feedback matters!
📅4. Set a Smart Schedule
Consistency is key, but moderation matters. Oily or acne-prone skin may handle exfoliating 2–3 times a week, while dry or sensitive types might need just once a week. Find what works best for your skin type and stick to it.
🥗5. Nourish from Within
Your post-exfoliation glow isn’t just skin deep. Drink plenty of water, eat nutrient-rich foods, and get enough rest. Healthy habits on the inside help amplify your radiance on the outside.
Treat your skin kindly after exfoliating, and it’ll reward you with lasting softness and a luminous, healthy glow.